
Outline
Instructions Provided Below
- Add New Post
- Title
- URL
- Body of Post
- Categories
- Post Tags
- SEO Settings
- Saving & Publishing
Step 1 – Add New Post
- Login to the backend of your website.
- In the Main Menu on the left, look for the POST menu. Click Add New under that menu.
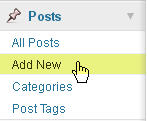
-
A blank post page will appear.
Step 2 – Title
The first field at the top of the page allows you to type in the title for your blog post. Make sure your title contains your primary keyword phrase that you prepared. It can include other information on top of the keyword phrase, but try and keep it to 54 characters or less.
 If you have both a primary and secondary keyword phrase, you can incorporate both into the title. Remember, do not use dashes or ampersands in the middle of a particular phrase.Example:
Primary Keyword Phrase: “Wakefield MA Homes For Sale”
Secondary Phrase: “100 Main Street Wakkefield MA”
Combined Title: “Wakefield MA Homes For Sale – 100 Main Street Wakefield MA”Note: Try not to change your title after you enter it the first time. The title is used to create the website address that takes people directly to this blog post.
Step 3 – URL
The system automatically uses what you entered for a title to create a url that points directly to this blog post. If you change the title later, the url does not automatically update.

Note: The url can be edited prior to publishing your blog post. After publishing, DO NOT CHANGE the url.
Step 4 – Body of Post
The body of the post is where you should enter your text and photos.
There is a formatting toolbar at the top that allows you to change the look and feel of your blog post. It is similar to the toolbar that you see in Microsoft Word.
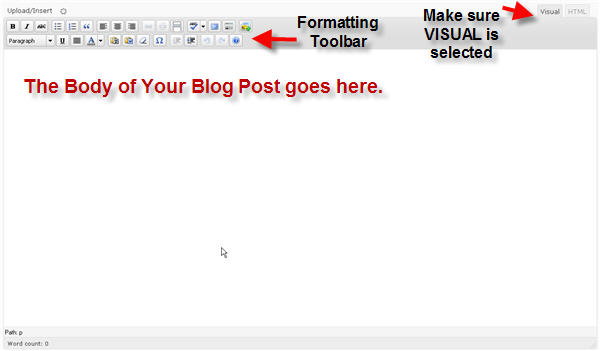
Note: Remember that your primary keyword phrase should be included in certain parts of the body of the post.
Step 5 – Categories
Categories allow people who visit your website to easily view all of your blog posts on particular topics. When you create a blog post, it is therefore important to select one or more categories that describe the content of the post.
To select a category, simply click the check box next to the category name.
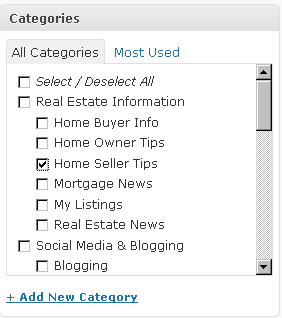
Note: There is a hierarchical structure to categories. If you select a child category, the system will automatically also select the parent category once you save your blog post.
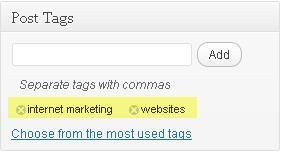
Step 6 – Post Tags
The “Post Tags” section is used for words or short phrases that describe this blog post. These words can come from your keywords or be subcategories. For example, if you are posting a single family home for sale, your tags may be: single family, colonials, 3BR, Wakefield MA. Tags are meant to provide groupings beyond the categories that you select for this blog post.
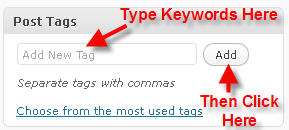 Enter a phrase into the space provided, then click ADD.
The phrases you entered will appear below as you add each one.
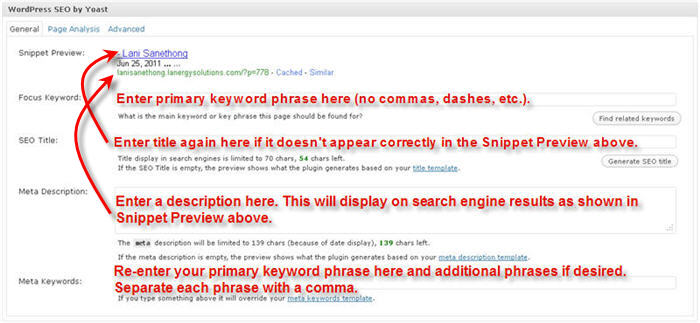
Step 7 – SEO Settings
The WordPress SEO by Yoast section is very important and should not be skipped. See the image below for guidance on what to enter into each field. As a beginner, you need not worry about the page analysis tab.
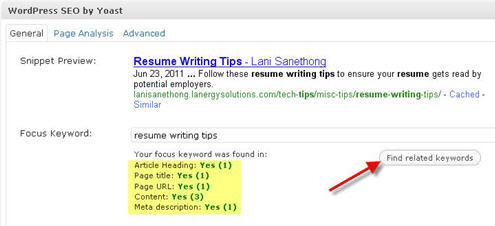
This tool has the ability to check whether you entered your primary keyword phrase into all the critical areas. Click the “Find Related Keywords” button on the right. After a few moments, the highlighted section below will appear. If anything is marked as “No”, this means that you forgot to enter your primary keyword phrase into that section. You can go back and correct the areas you missed.
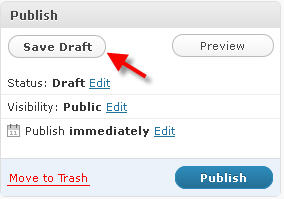
Step 8 – Saving & Publishing
You have 3 options for saving your blog post:
- Save As Draft – Allows you to come back later and complete it.
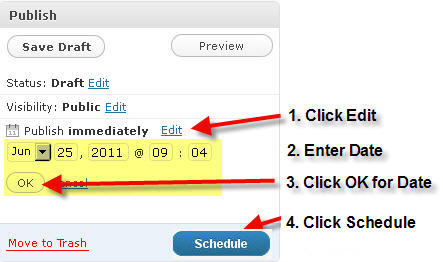
- Publish on a Future Date – Will not be visible on your site until a specific date and time.
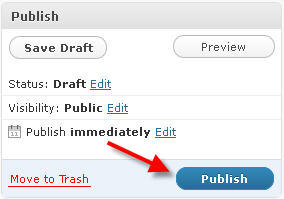
- Publish – Makes it immediately visible on your site.
| SAVE AS DRAFT Click the button. To edit this post later, click on Posts in the main menu and it will appear on the list. |
 |
| PUBLISH ON FUTURE DATE Follow the 4 steps displayed in the diagram. |
 |
| PUBLISH NOW Click the Publish button and your blog post will be immediately visible on your website. |
 |

