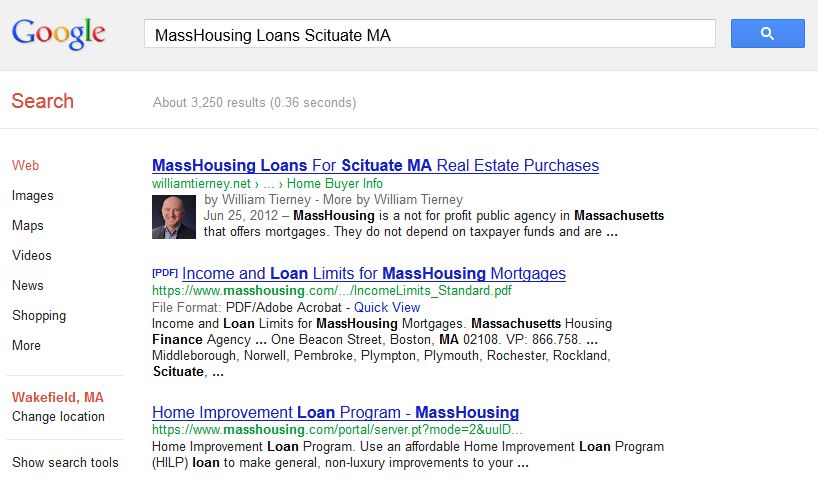
Have you ever run a search on Google and noticed that some results display the profile picture of the blog author? This makes your blog stand out and may lead to higher click thru rates. If you are a Google+ user and have a WordPress website, it’s easy to set up blog author profile pictures in Google search results.Below are step-by-steps instructions to accomplish this. It should only take minutes to complete!

Google+ Account Changes
- Log in to your Google account.
- Go to Account, then select Products from the menu on the left.
- In the products list, select Google+.
- Hover over the G+ icon in the upper menu and select PROFILE from the list.
- Copy the url at the top of the page. This is the url for your profile and you will need it later.
Example: https://plus.google.com/113928171358423800793/posts - Click the ABOUT link in the gray menu area across the top of the page.
- In the links box (second column), click the Edit link.
- In the “Contributor To” area, click “Add Custom Link”. Enter a description of the website (i.e. “My Blog”) and the url. Click the blue SAVE button in the lower right.
- Upload a high quality profile photo (if you don’t already have one).
WordPress Website Changes
Lanergy Solutions Website Clients
If your website is hosted by Lanergy Solutions, email our customer service team the url for your Google+ profile (from step 5 above). Our team will take care of the rest!
Non-Lanergy Solutions Clients
If you are not a client of Lanergy Solutions, the following steps must be completed on your WordPress website.
Author Page Changes
- Edit the About or Author page of your website.
- In the body of the page, insert a hyperlink to your Google+ profile link.
Example: <a href=”https://plus.google.com/113928171358423800793/posts” rel=”me”>My Google+ Profile</a> - Save the changes to the page.
Menu Changes
- Go to the custom menu area (under Appearance/Menus).
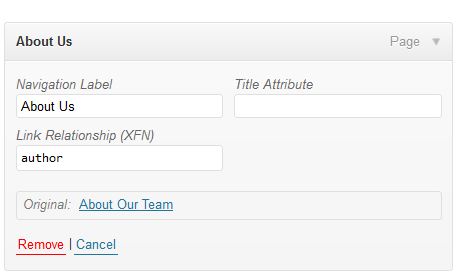
- Click on the Screen Options tab in the upper right and make sure “Link Relationship (XFN)” is checked off.
- Find the menu that goes to your About or Author page. Click on the arrow to view the menu settings.
- Enter “author” into the Link Relationship (XFN) field.

- Click SAVE MENU to save your changes.
Verifying Your Changes
Wait a few days for Google to recognize your changes. You may test whether it worked by using the Google Rich Snippets Testing Tool.
- Visit http://www.google.com/webmasters/tools/richsnippets.
- Enter the url for the About or Author page on your blog website.
- Click the red PREVIEW button.
- If the preview shows your profile picture, then your changes have worked!


